SES POW Device
SES POW is a power meter switch, With an LCD screen, it can track your appliances’ power, current, and voltage in real-time and cumulative power consumption.
POW supports checking power consumption historical data accurately to the 30 minutes, the data can be exported to Excel on your phone. You can set daily/monthly power consumption thresholds when the consumption goal is reached, you will get a push notification.
POW with the highest flame-retardant grade V-0 enclosure, upgraded terminal wirings, and more amounts of tin minimize every security risk detail.
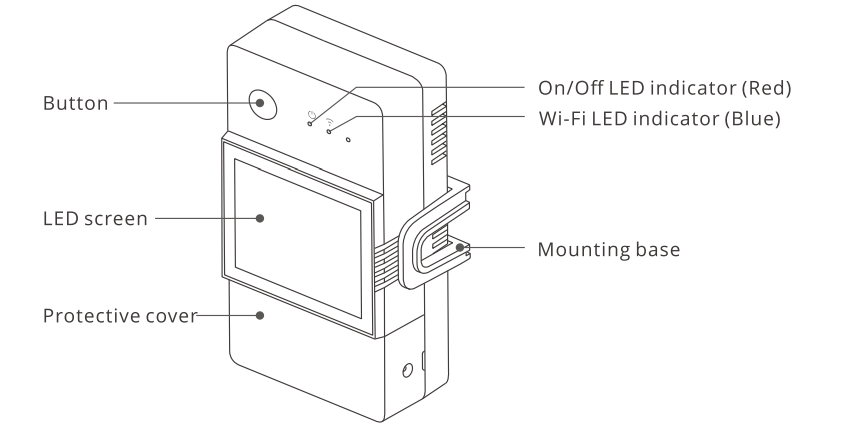
LED Indicator Status Instruction
| LED Indicator Status | Status Instruction |
|---|---|
| Red LED indicator keeps off | Relay open |
| Red LED indicator keeps on | Relay close |
| Red LED indicator quick flashes for 10 times | Find device button pressed from local device dashboard |
| Blue LED indicator keeps on | Device is connected to wifi & Cloud |
| Blue LED indicator quick flashes (100ms) | Connecting to Cloud |
| Blue LED indicator quick flashes (300ms) | Connecting to Router |
| Blue LED indicator flashes at 1 sec | Device in AP mode |
Buttons Instruction
| Actions | Results |
|---|---|
| Button pressed longer than 10 sec | Reset Device |
| Button pressed less than 10 sec | Reboot Device |
Specifications
| Specification | Detail |
|---|---|
| Model | SES POW |
| Input | SES POW: 100-240V ~ 50/60Hz 20A Max |
| Output | SES POW: 100-240V ~ 50/60Hz 20A Max |
| Wi-Fi | IEEE 802.11 b/g/n 2.4GHz |
| Operating temps | 10T40 (-10°C~40°C) |
| Working humidity | 5%-95% RH, non-condensing |
| Shell material | PC VO |
| Dimension | SES POW: 98x54x31mm |
| High voltage connector wire | SES POW: 1.5mm² to 6.0mm² |
| Rated impulse voltage | 2500V |
| Remark | External preliminary protection with Max. C 20 A circuit breaker in the supply line required under all circumstances. |
Local Web UI Instructions
Setup of newly flashed device
-
Search for Local WIFIs and connect to the device.
- Connect to
SECXXXXXwith password12345678. - Open ip
192.168.4.1in browser.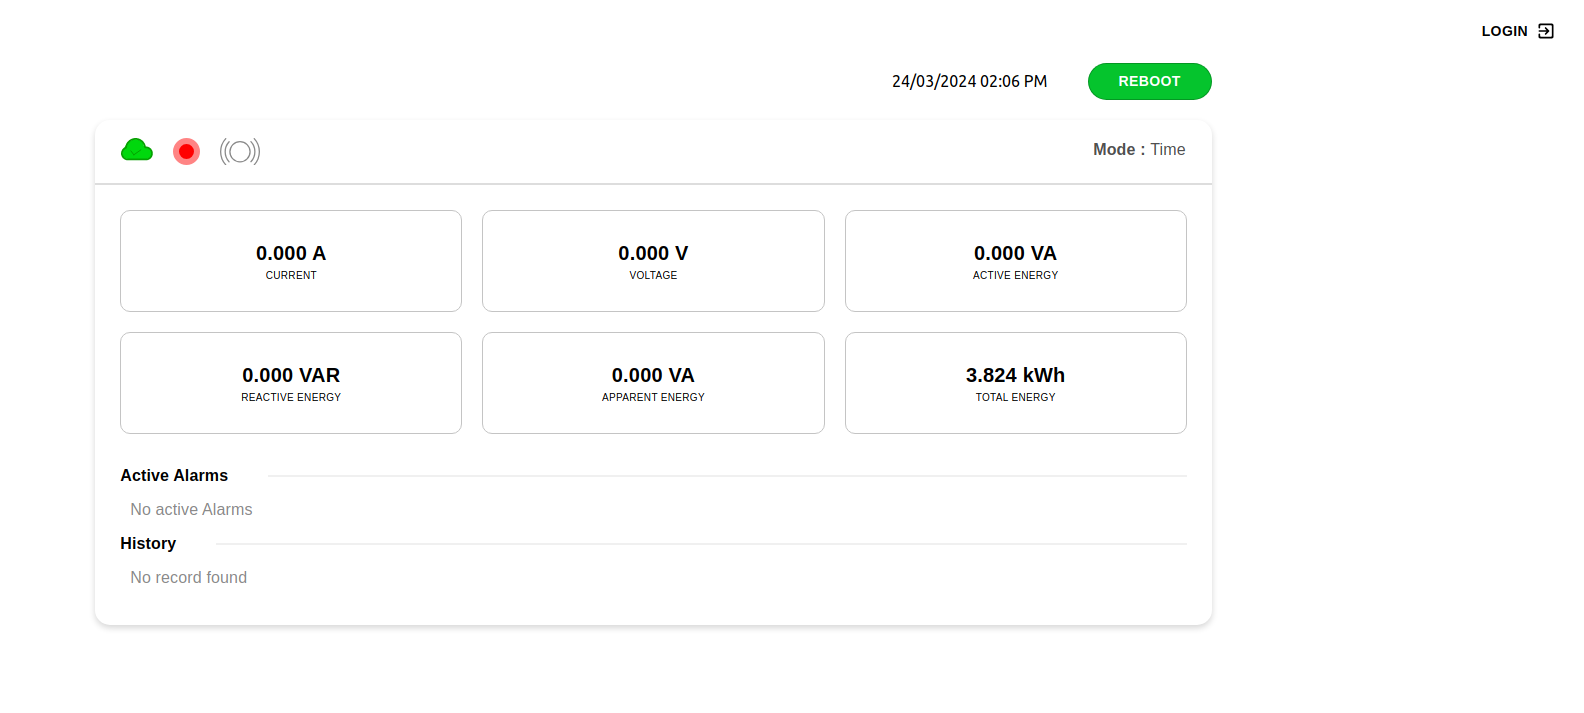
- Connect to
-
Login to Device web interface
- Use the default user id
userand passwordSES01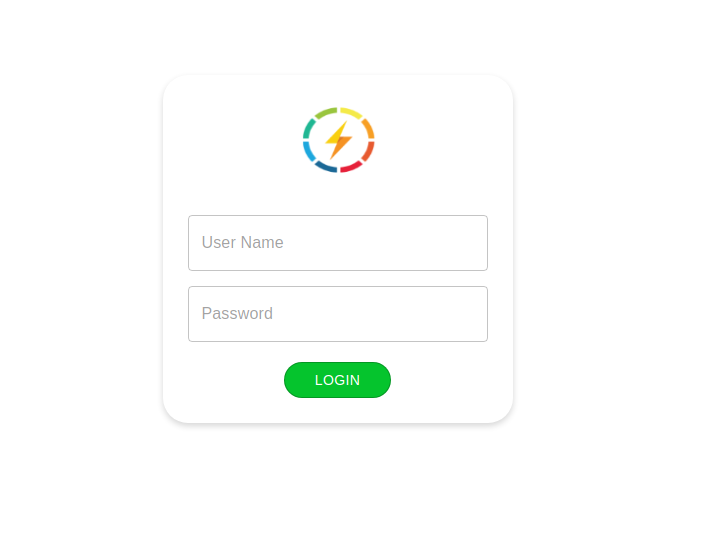
- Use the default user id
-
The device will allow you to connect and configure it.
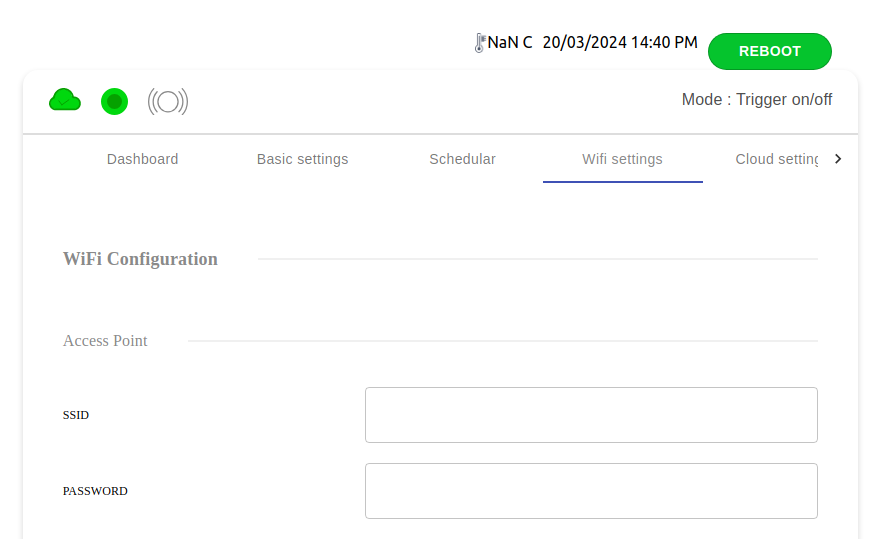
- Configure the device to be on the WiFi Router on WiFi Configuration Tab.
-
Set the device to connect to the WiFi Router and restart the device.
-
After reboot device will connect to WiFi Router then check device
ip addresson router & open it in browser and login as we have done in step 2. -
Now in Cloud configuration tab configure devices with correct
cloud settings.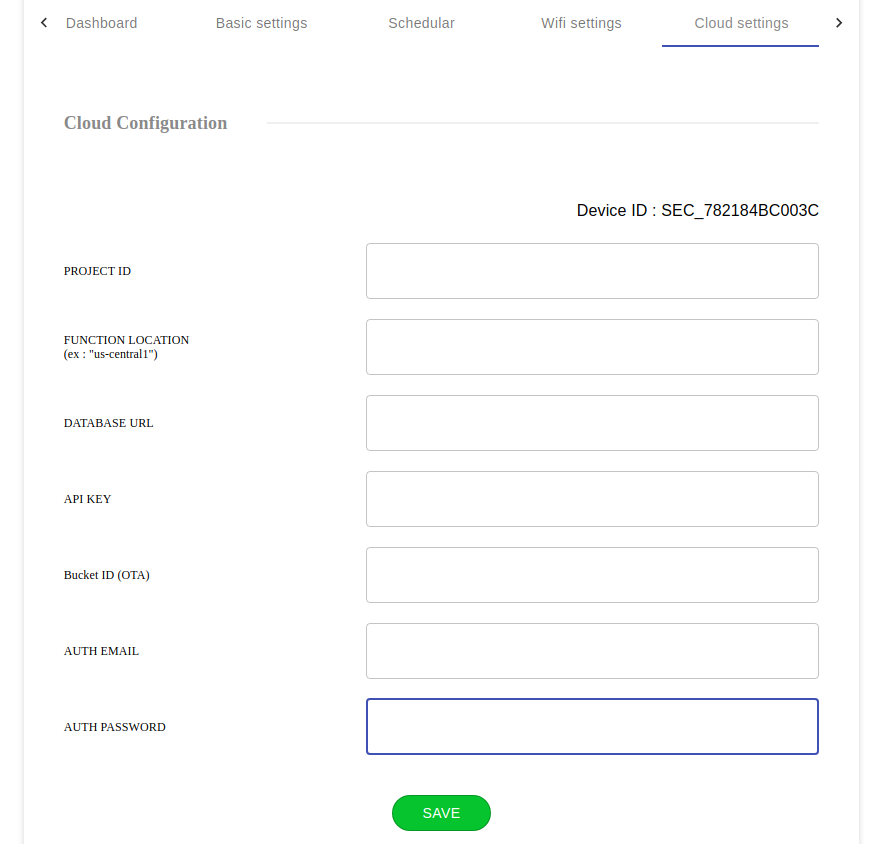
-
Reboot the device
-
After Reboot device will connect to WiFi and cloud. Now device is ready to be further configuration from SES Admin Dashboard.